Monday, 28 December 2020

Things I learned over a few years crocheting


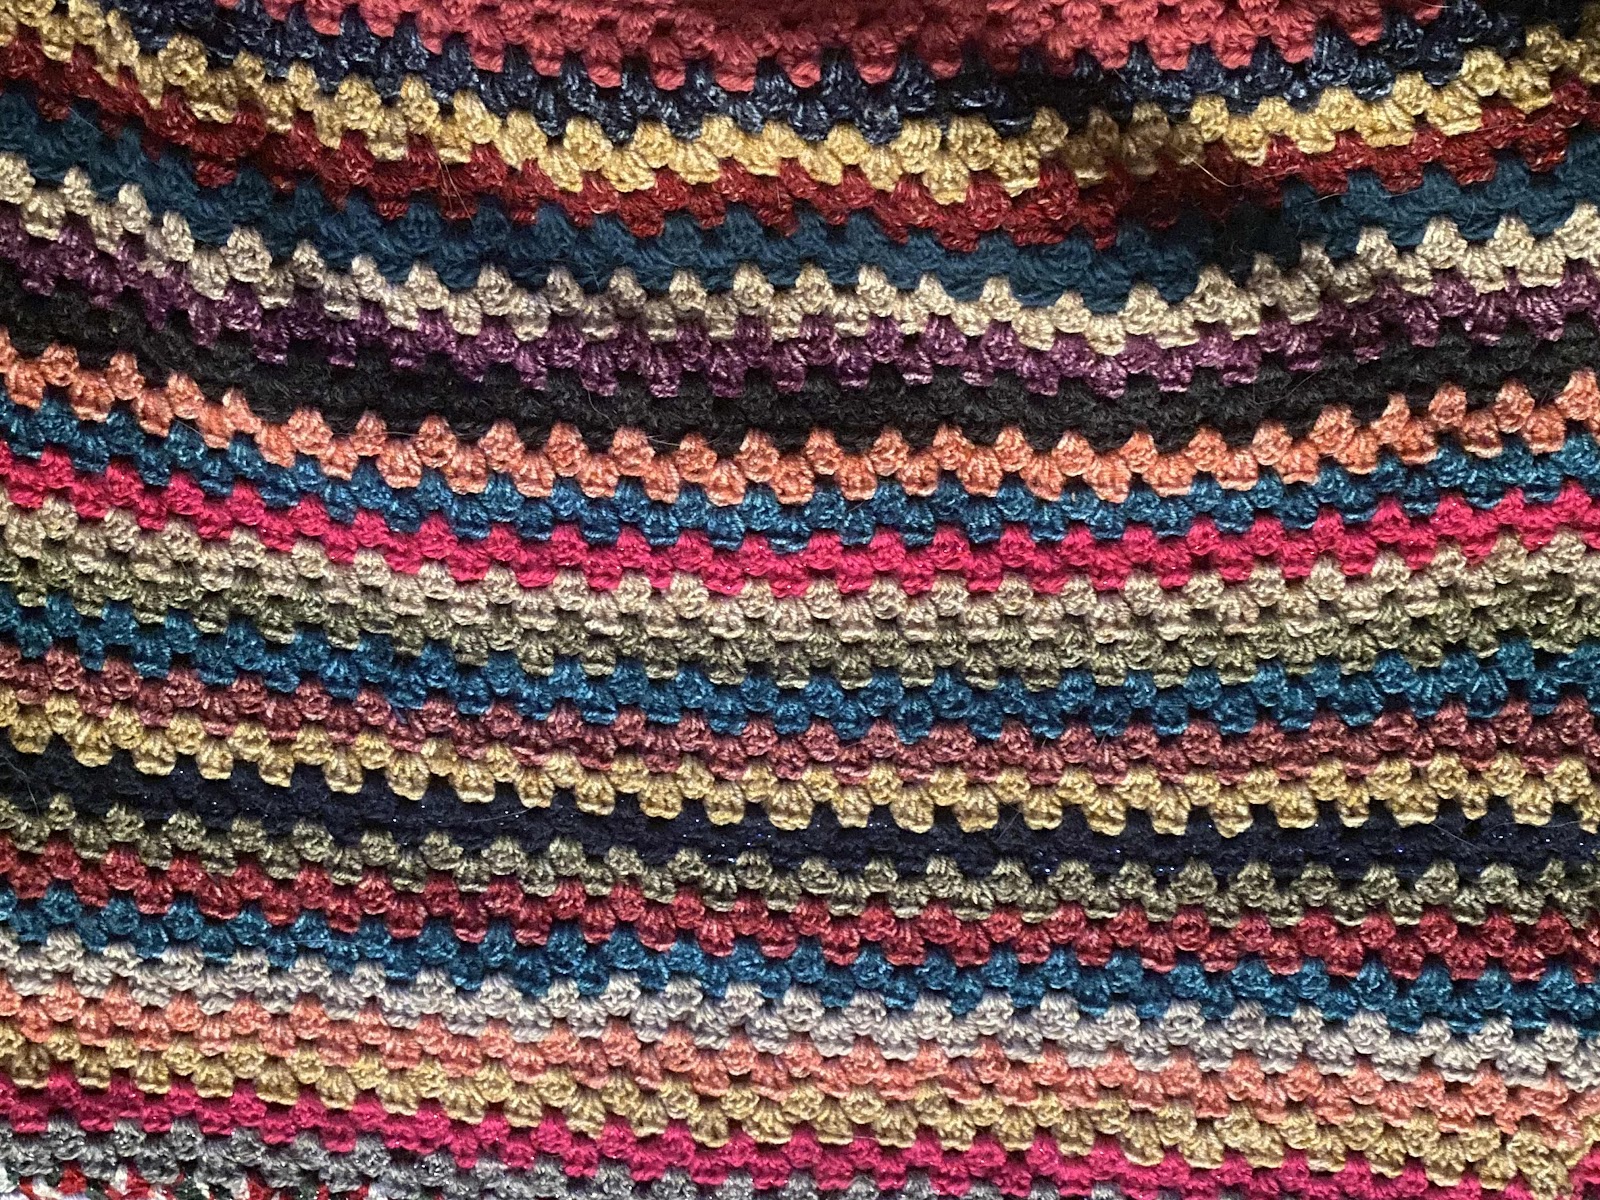
A few years ago I finally worked out how to crochet. These granny stripe blankets were all the rage at the time. Me bring me I jumped right in and decided to use up my odds and ends I had and do a single bed size blanket. Did I manage it? Nope! But I did learn so much as I went along. 
  1. Not all yarn weights are the same over different brands or even colours 
  2. Starting smaller wouldn’t of had me looking guiltily at this project every time I saw it
  3. That pretty yarn with the sparkly lurex thread is a pain to rip out and gets caught up and breaks if I’m not fully paying attention
  4. My ability to count to 3 is not as good as I thought it was. I have a few 2’s and 4’s in groups instead of a group if 3 here and there
  5. The randomness of the colours look a lot better than I thought they would 
  6. My granddaughter seems to think every time she sees me working on something that it’s for her :-)
  7. Working on a project this big sucks big chunks of time. When I craft I tend to watch a series or listen to audiobooks. I’ve watched and listened to a lot while working on this 
  8. Keep a looser tension when doing the foundation chain or it will curve and not be as long as you need it to be
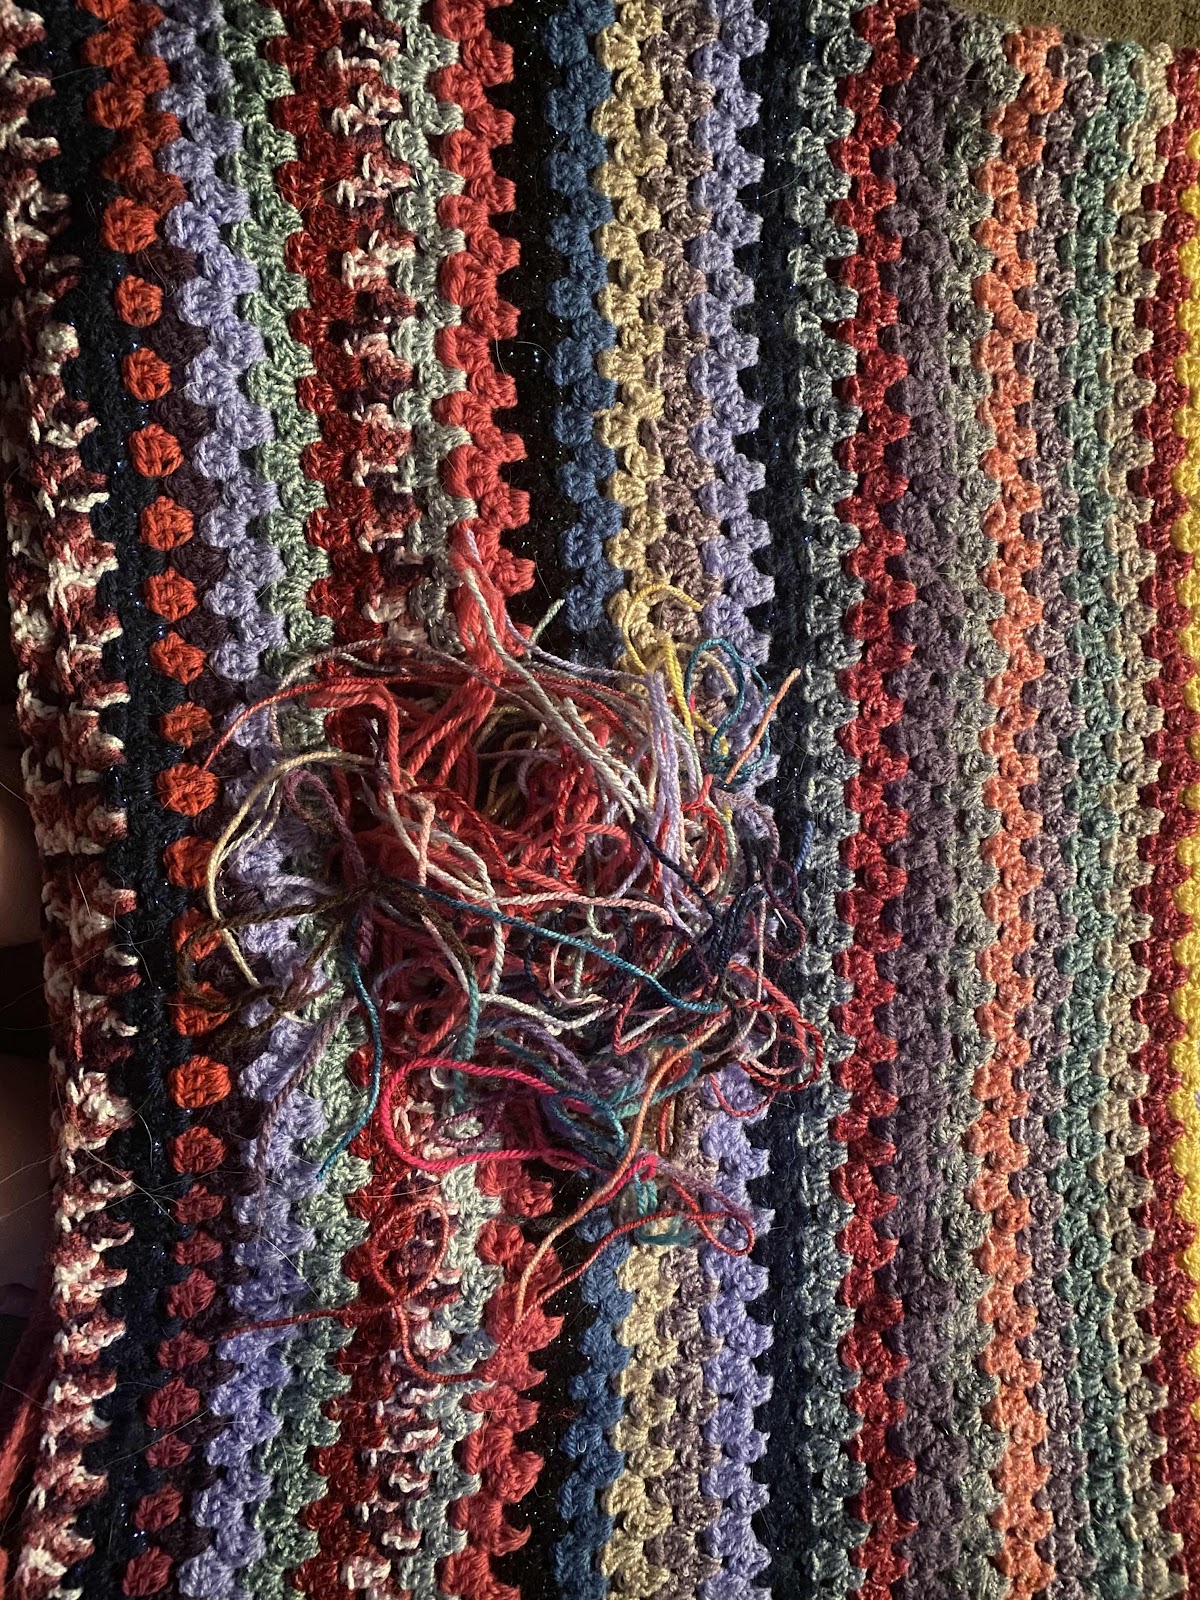
  9. Weave your ends in as you go. The pile below is what I weaved in today


10. I’ve loved every minute 

I may add a border later to even put my wonky edges. This blanket is a perfect size for snuggling up on the sofa with. I’m so glad a persevered and kept going. Even though I’ve improved my crochet and am more advanced I wanted to finish this and display it proudly on the back of a sofa ready for the cold evenings to snuggle under. 

What have you learned lately. 

Tuesday, 13 October 2020

Fabric flowers


On Sunday I took a zoom class with Clare Mackaness from Beautiful Things. You can find her on youtube and Facebook or her website. I love how Clare makes everything achievable and fun. She teaches crafts, sewing and crochet to name a few things I’ve learned from her. Definitely recommend her if you are looking for something to learn online. 

The flower was made with circles of fabric, some machine sewing and some hand sewing. It could all be done by hand if you don’t have a sewing machine though. 

A button is used to finish it off and hot glue or fabric glue also comes into play. I yet again survived using my glue gun. Some days I just impress myself 😁 

I used a hair alligator clip to finish it off and for it to be able to wear it. In fact I put it in my hair and forgot it was there until I got ready for bed that night. 

A very fun class that leaves me ready to grab some of my scrap fabrics to make more. It’s and excellent project to use up scraps and odd pretty buttons we keep hold of. Great coordination items to go with home made items. Or even up cycling some well worn favourite clothes. 

After my last craft failure it was great to do something that worked well and came out well. Thanks Clare 

Saturday, 10 October 2020

New failures in craft

I’ve always admired the art of pyrography and the people who can do it. I can’t draw well so didn’t ever think I could do anything like that. Then I watched a YouTube video using a chemical burn pen or a scorch pen. Simply draw on apply heat with a heat gun or an iron etc. And be left with a lovely masterpiece. To be fair they showed their failure too. 

In my defence I think there was to much of my stencil to colour in with pen and I oversaturated it possibly. It all started so well. 

I used my Cricut to cut out 2 designs to apply to some wood slices so I could colour them in with the pen I bought from Amazon. 

So far so good. Then I coloured them in. And removed the vinyl. 
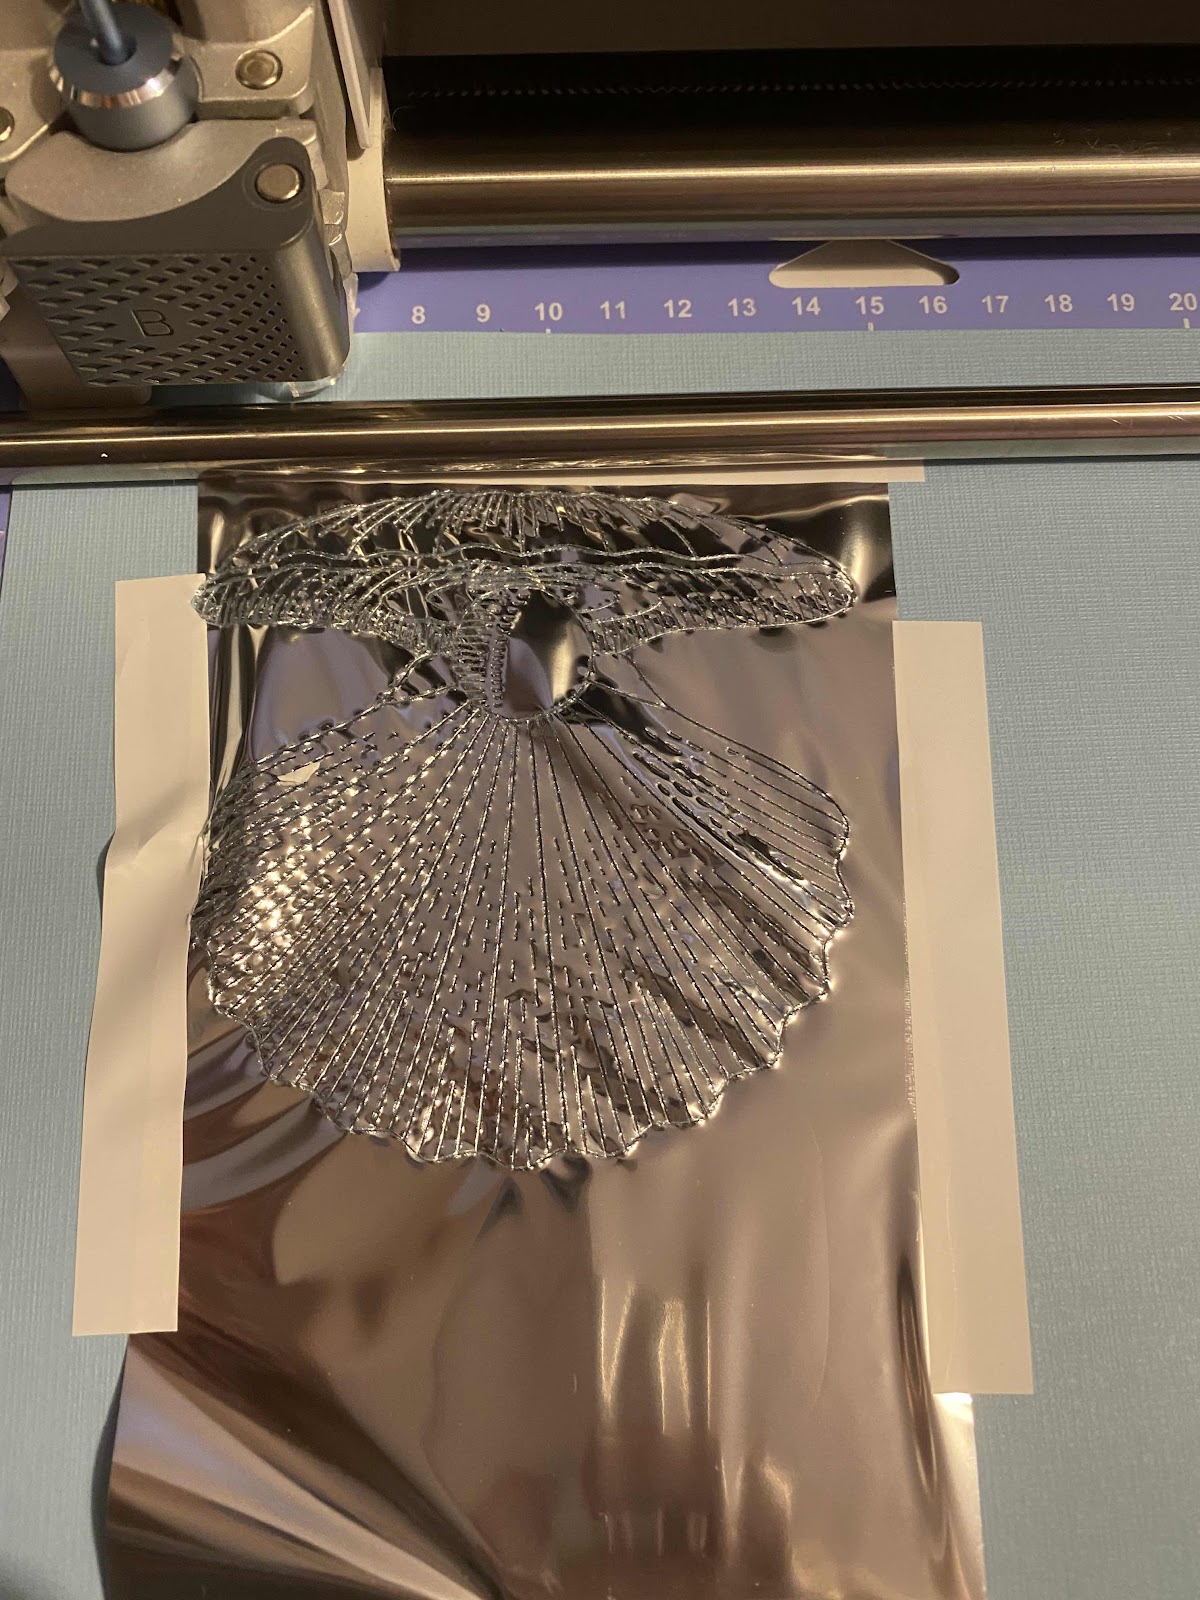
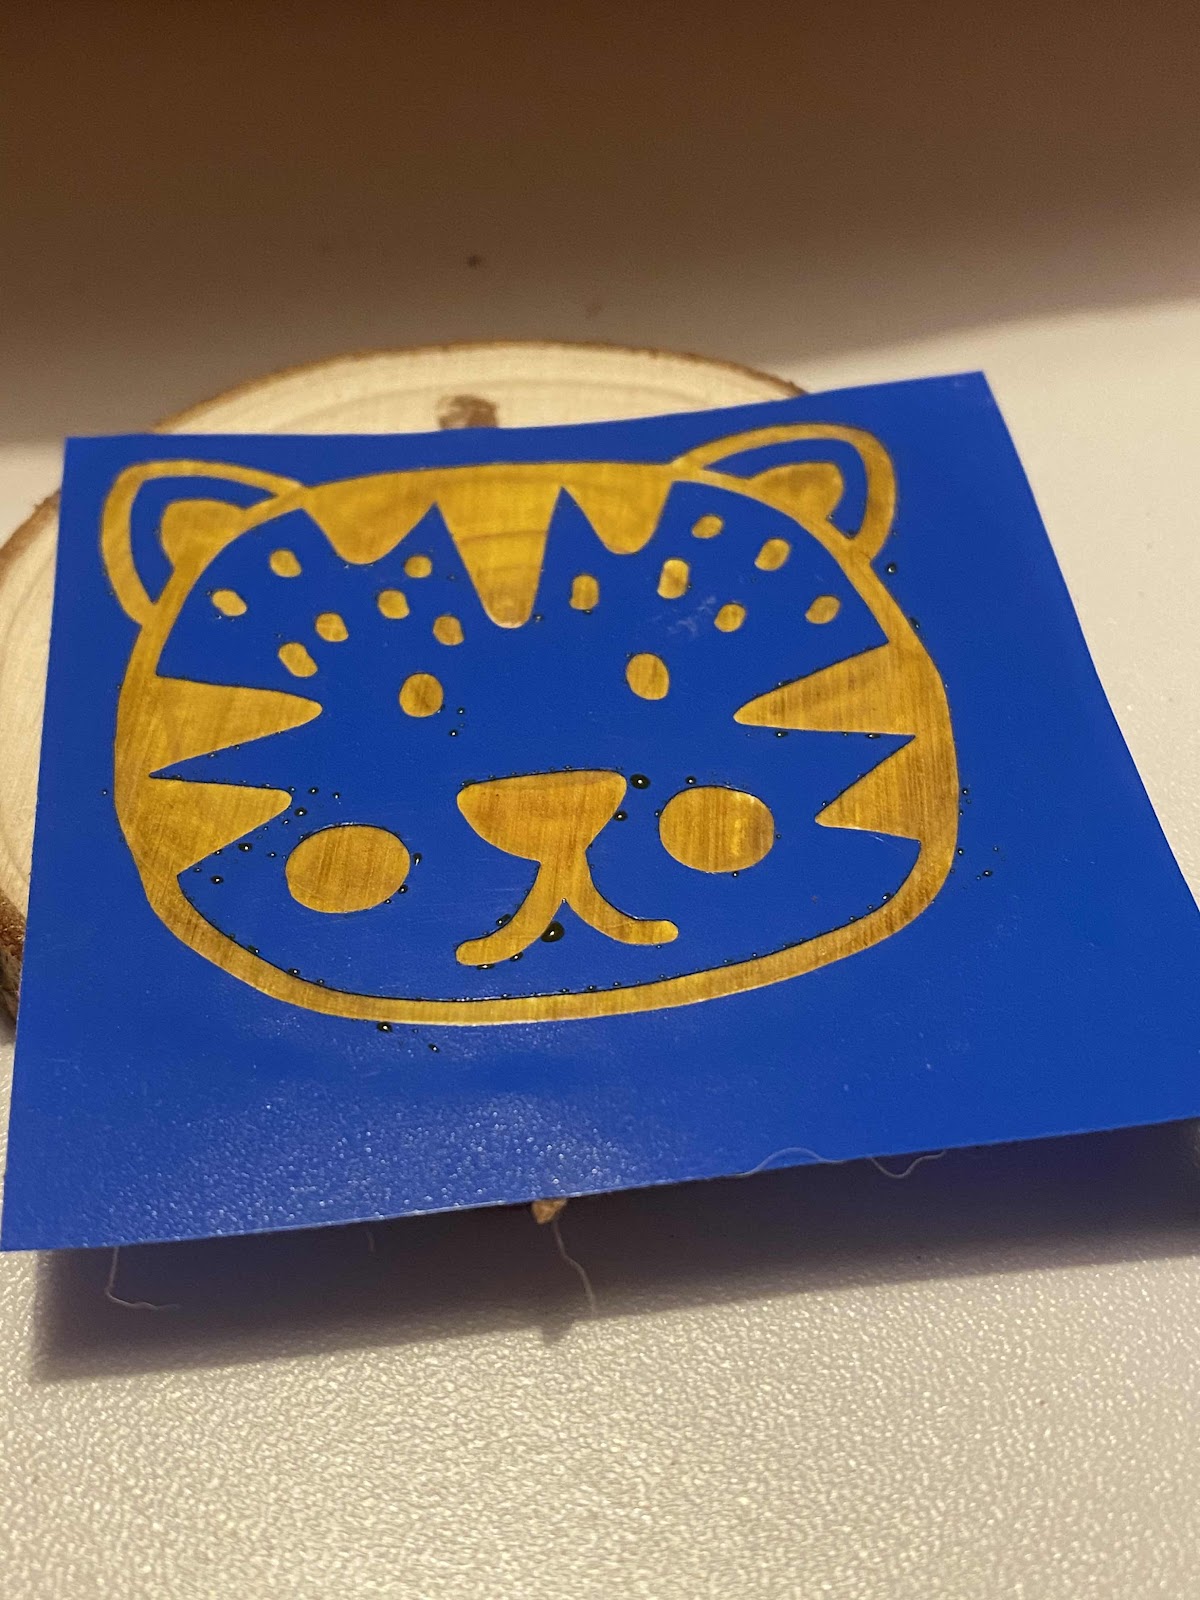
Then I used my Cricut mini press and covered with paper abs heated for only 5-10 seconds and that’s when it all went wrong. 


Obviously way to much of the pen. After closer inspection the pen says you don’t need a lot of it. Next I turned the wood over and tested the amount, simple lines and writing, then, applied head again and it worked much better.

Definitely worked better this way. Light handed is the way to go. Will give this another go soon and hopefully will produce better results. Was hoping to make some tree decorations with the wood slices. 

Meanwhile I’m off to do something I know will work to boost my confidence up a bit. Tomorrow’s another day. 


Thursday, 8 October 2020

Cricut foil transfer kit

Sometimes I am so easily amused and this was one of those times. Having not hung out as much online with other Cricut users I was a bit behind the times. Didn’t discover about the foil transfer kit until after it came out so splashed out and treated myself. Up until now I’ve not gotten around to having a go of this. 

It’s a system that uses pressure with your machine and comes with 3 nibs to go in the housing with fine, medium, and bold settings. 

The pack also comes with foil sheets and sticker tape to tape the foil down. Surprisingly, the foils more robust that they appear. As a last minute whim last night I got out the kit and card to give it a go. I found the shell in design space and set things up as instructed.  It came out of the Cricut looking like this. 
Next time I will take more care with the sticking down of the foil sheet and tautness. However, as I pulled back the foil after the Cricut had finished its job it all turned out ok. That first peek took my worries away. 


So pretty and shiny! Even the used foil held up to the light was wondrous to look at and play with in the light. 

I’m hoping to find a perfect family tree to try to do with this foiling technique because I am in love with it. Photos do not do it justice of how shiny and beautiful it came out. 

This design was about 3.4 inches tall I think it was so quite detailed for the size of it. I used the medium nib and one of the silver sheets of foil that came in the pack. It came with 6 each of silver and gold. 

Great tool to have in your repertoire, especially if you like to make cards and decorative bits and bobs. It can also foil faux leather I believe and will look into other materials it can be used on soon. 


Saturday, 3 October 2020

Hogwarts house masks

Up until now I’ve not really made that many face masks. We have them of course but we have some ready made ones and a few home made ones. However, we have a Harry Potter related event happening with 4 people and I had some fat quarters of the houses so I had to make some face masks. I followed a tutorial from the stitch sisters on YouTube for a basic mask and it worked well. 

I didn’t even mind all the pressing/ironing the pleats in. Anyone who knows me knows I dislike using an iron. For sewing it kind of essential for a good finish though so was well worth it.  Here they are all pinned before final top stitch 

And here they are finished. Used a yellow thread because they all have yellow in them. Huge bonus and didn’t have to keep rethreafing machine for each mask. 

A while back I made my lively daughter in law this wristlet key fob and a scrunchy out of the same hufflepuff fabric and she was delighted with it. 


Just recently I have been doing smaller projects. It’s very satisfying to finish things all in one go and not stress about time for finishing them. 

Friday, 2 October 2020

Jamming it

It’s been a wet cold miserable day. It seemed the heavens opened every time I had to go outside. It’s ok though I quite like the rain and hearing it fall. Somehow though, it left me with the need to hunker down and feel I had done something worthwhile. Having been lucky enough to be gifted with 6 rather fine stalks of rhubarb I started reminiscing about a jam I made about 8 or 9 years ago Rhubarb and vanilla jam. Totally reminded me of one of my childhood favourites rhubarb and custard sweets. With a little looking around Pinterest and my own books I worked out what I needed and was delighted I had it all. Very simple but worked so well 
I used 
1kg cleaned trimmed and chopped rhubarb
700g of granulated or caster sugar (I used half vanilla sugar)
Juice of half a lemon 
2 teaspoon of vanilla extract 

This made enough for 2 biggish jars. That I cleaned and sterilised before hand. I actually did 3 as wasn’t sure how many I would need. 

I started by stirring the chopped rhubarb and sugar together until it all came together and looked like this. No liquid was needed at all. I then stirred through the lemon juice and put onto heat stirring and making sure it didn’t catch. 


It didn’t take long foe the sugar to dissolve and the rhubarb start to break down and release its juices. It looked like this after just a few minutes. 

220 f or 105 Celsius is the setting temperature for jam.as it reached this temperature and was taken off the heat I stirred through the vanilla extract.  This was close but just under as wasn’t taking the picture at a level angle with the jam thermometer. I also took out a teaspoons worth and placed on a cold plate and after a minute checked it was holding it shape especially when pushed with a finger and formed wrinkles/ridges. 

At this point I decanted into jars and put the lids on. They are now being left overnight to cool and set up. Not the pink of rhubarb I know but the smell and taste is amazing. 


Hidden in the back of my cupboard is a jar of sugar I keep with used vanilla pods in and they flavour and scent the sugar. As I didn’t have quite enough caster sugar in the cupboard I took out the jar of vanilla sugar giving me more of a vanilla kick. I simply left the pods in the jar and topped it up putting it back in the cupboard until next time I want it. I keep forgetting I have it. Had to hide it as the children kept eating it and I was left with none for my baking. 

Hubby isn’t a fan of rhubarb so that’s more for me and youngest son to tuck into. 

I haven’t made jam in a few years and forgot how easy and enjoyable it is. Best of all is that over the cold dark days ahead we can have a lovely comforting rhubarb jam on or toast or in cakes to remind us of warm sunny days. 

Thursday, 1 October 2020

It’s beginning to cost a lot like Christmas!

Don’t know about you but my mind sang that title line. As I did when I saw this design on designbundles.net It’s been a long while since I did a heat transfer vinyl (HTV) project with my Cricut and decided today was the day. Did the day cooperate? No it didn’t but finally got there in the end. 

I used to keep my spare canvas bags and sublimation bags in separate places. A while ago I decided to organise everything craft wise and put them in the same place. Then promptly forgot and dragged out so much looking for a tote bag today. After much coffee and muttering to myself I finally had a brainwave and remembered. By that time I had to go do my motherly and grandmotherly duties and had to wait until this evening to complete this tote bag 

Another bag to try not to forget when I go shopping  somehow I’m hoping the pretty shiny and sparkling parts will catch my eye and make me remember to pick it up. I’ve used standard HTV, glitter and metallic. It’s so pretty and apart from the wording it was all done with my off it’s so didn’t cost to much to make. 

Might have to make a Halloween themed bag next. I did make some trick or treat bags a few weeks ago for my granddaughters. They won’t be trick or treating but they can receive the bags with some treats from me :-) 


Thursday, 21 May 2020

Fabric bookmark corners

Still using scraps and these took me down memory lane. My mum once showed me how to fold paper to make a corner bookmark. I really do not like books that have had their corners turned down or creased so bookmarks are needed. Saying that I use a variety of things for bookmarks. Usually the nearest flat thin object. Receipts, membership cards, paper money, coasters, pierces of yarn....... I’m sure you get the idea. So I used 3 4 inch squares to make some corner bookmarks from fabric. 
Square one was interfaced on one half by a half triangle shape and folded over and pressed into a triangle itself. This was placed on a corner of an interfaced square facing right side up and covered by a third square right side down. 

Sew all round leaving a turning gap, clip corners and turn through and press after poking corners out. Press again and top stitch close to edge closing the open edge 


So now I have 3 bookmarks for around the house. Pretty ones at that. 

 Tutorial came from Pinterest and on craftystaci.com. Got to admit I’m having a blast with quick and easy projects at the moment. Need to find more projects to keep me amused in my time I get to myself in the evenings. 


What do you do? Fold the corners or use a bookmark of some description? 

Wednesday, 20 May 2020

Scrappy book cover


At the start of the month I celebrated my birthday in lockdown. Claire from Beautiful things HQ ( youtube and Facebook is where you can find her groups and pages) held a zoom class for a book cover using scraps. I believe it is now or soon will be a online class on her website to. So I booked myself into the class and joined in and made a book cover. No photos here sorry. Today I got sent to get some time to myself to sew or something. First thing that came to mind was all the wonderful scrap pieces from making the wonderful peg bag and making a new notebook cover. I love it. 
It started well and looked pretty even before the sewing started. Claire’s style of teaching really left me with no doubts on my second go at this and whizzed through it no problem. Only thing I had to watch out for was by making sure my bobbin was full when I started. 
The other side is just as pretty and very individual. I have a thing about notebooks and love buying new ones. 
The inside flaps that hold the cover on are bright and cheerful. Im having so much fun with these books and scraps. I’m already on another project to use some more of the scraps up. 
My other thought was how many projects can I get out of this fat quarter pack I’ve been using. Will have to keep all the bits together and see I think. 

Peg teepee

I’ve not quilted in a while and I really didn’t need a new peg bag but when I saw someone else’s version. Of this I had to have one. It’s called a Quip by little patch pockets. I had just the bundle of fat quarters to use for it to. It can use squares, scraps or even just one fabric. 

I have to admit I really got confused at one stage and had to read the instructions 20 times as couldn’t figure out at which part to cut the fabric using the pattern/template. Anyone else do this? Read something wrong and then can’t read it correctly? Which was exactly what I did. Not the patterns fault it was mine! Got there in the end though. Took me a couple if evenings to make. Then, a 2 day gap. The last stage said to hand stitch the binding in place so I put it to one side as I hate hand sewing. 

Finally got around to the hand stitching and didn’t take me long at all in the end. I think it looks amazing. It’s not the sort of thing you make more than one of for yourself really which made it an expensive pattern for a one male use. However, now I’ve made one I know what to do and I might make a few more for friends etc and experiment with the look and quilting of it if I do. 

Bias binding and myself do not have a good history but this one distant fight me at all.  Maybe because I made it myself? Who knows. I’m counting if as a pleasant win and know I’ll be smiling every time I use this peg teepee as my daughter named it when I shared a photo when I started sewing this. 

Rainbow craft

Lockdown has been going ok here. Granddaughters have been here for 3 weeks and are keeping me busy and amused and hopefully I’m doing the same for them too. Recently I decided I needed a better rainbow in our window to show our support for the NHS and key workers etc. I had the girls help me find a stick on a dog walk. Also, they helped make pom-poms. They were a little confused at first wondering why we needed a stick but when the word craft was used they were all in with my plan. 


My Glue gun made an appearance  but not until we had unwound, measured, cut and attached rainbow colours of yarn to our stick by tying them on with a loop method. We then took our pile of pom-poms and glued them onto the stick and each other to give a cloud appearance. 


I was pretty impressed at how it all came out. All with yarn I had sitting around and a stick. The girls helped even the ends off so I’m leaving it slightly ragged. The hanger is just one strand of each yarn braided and tied onto the stick. It all hangs proudly in my front window now. 

The girls took the off cuts and continued cutting them to make rainbow ‘cakes and cookies’ imagination is a wonderful thing. Amazing how a few small bits can keep them amused for a long time :-) 

I’m so glad this pair have the craft bug like me. It’s fun to have partners in craft and fun. 

This wasn’t the stick we used obviously. However, it was the one the found and carried home for me to practice using my new woodworking tools on. How lucky am I? 


Thursday, 12 March 2020

Discovering old gems choc cherry cake

Now and again I write things down then promptly lose them. Or I don’t add titles on so have no idea what I’m looking at in my own shorthand. I made this recipe about 15 years ago and we loved it. Then lost it. Earlier today I found it. 

Chocolate and cherry cake, with a chocolate ganache style topping. I have to add this isn’t a die hard baking recipe it’s a more throw things together style of cooking. Not my usual style but somethings are good enough to let my standards slide a little. 

I started with a rummage in my cupboards and realised that I did have everything I actually needed. The stars aligned for me today! 

1 tin of cherry pie filling
1 pack of chocolate sponge mix ( but confused why I had this but hey ho)
And 2 eggs

Decant into a mixing bowl and attack it with a wooden spoon until mixed with no dry mix left showing 

I lined a large round tin with parchment/baking paper and added the mix. Baked for 35 minutes in a moderate oven until a toothpick came out of the centre clean. 


The topping was made from 1 cup of sugar. 5 tablespoons of butter, 1/3 cup of milk. These are heated in a pan and stirred until all melted then taken off the heat and 200g of choc chips or chopped chocolate are added and stirred in until glossy and well combined. Pour over cake while it’s still warm. 

You could of course wait for it to cool thoroughly and add store bought frosting or leave it plain. 

Meanwhile mine is cooling and we will try it later tonight to see this is a good as we remember when I scribbled the recipe down from a friend telling it to me years ago. 


Wednesday, 1 January 2020

Crocheting in the new year

Last night was a quiet one for me. Just me the tv and an idea for crochet. Earwarmers for the granddaughters with the yarn leftover from one of their hugs I made them. Such a simple rectangle sewn up to create the twist at the top. 


I think from their faces and his long they wore them indoors they adored them  


Keeping up with my bad photos reputation here’s the first one I made and laid flat.


New year's resolutions are not being made this year. Apart from putting less pressure on myself and try to live a simpler life. Let's see how far this works for.