Showing posts with label sewing. Show all posts

Tuesday, 13 October 2020

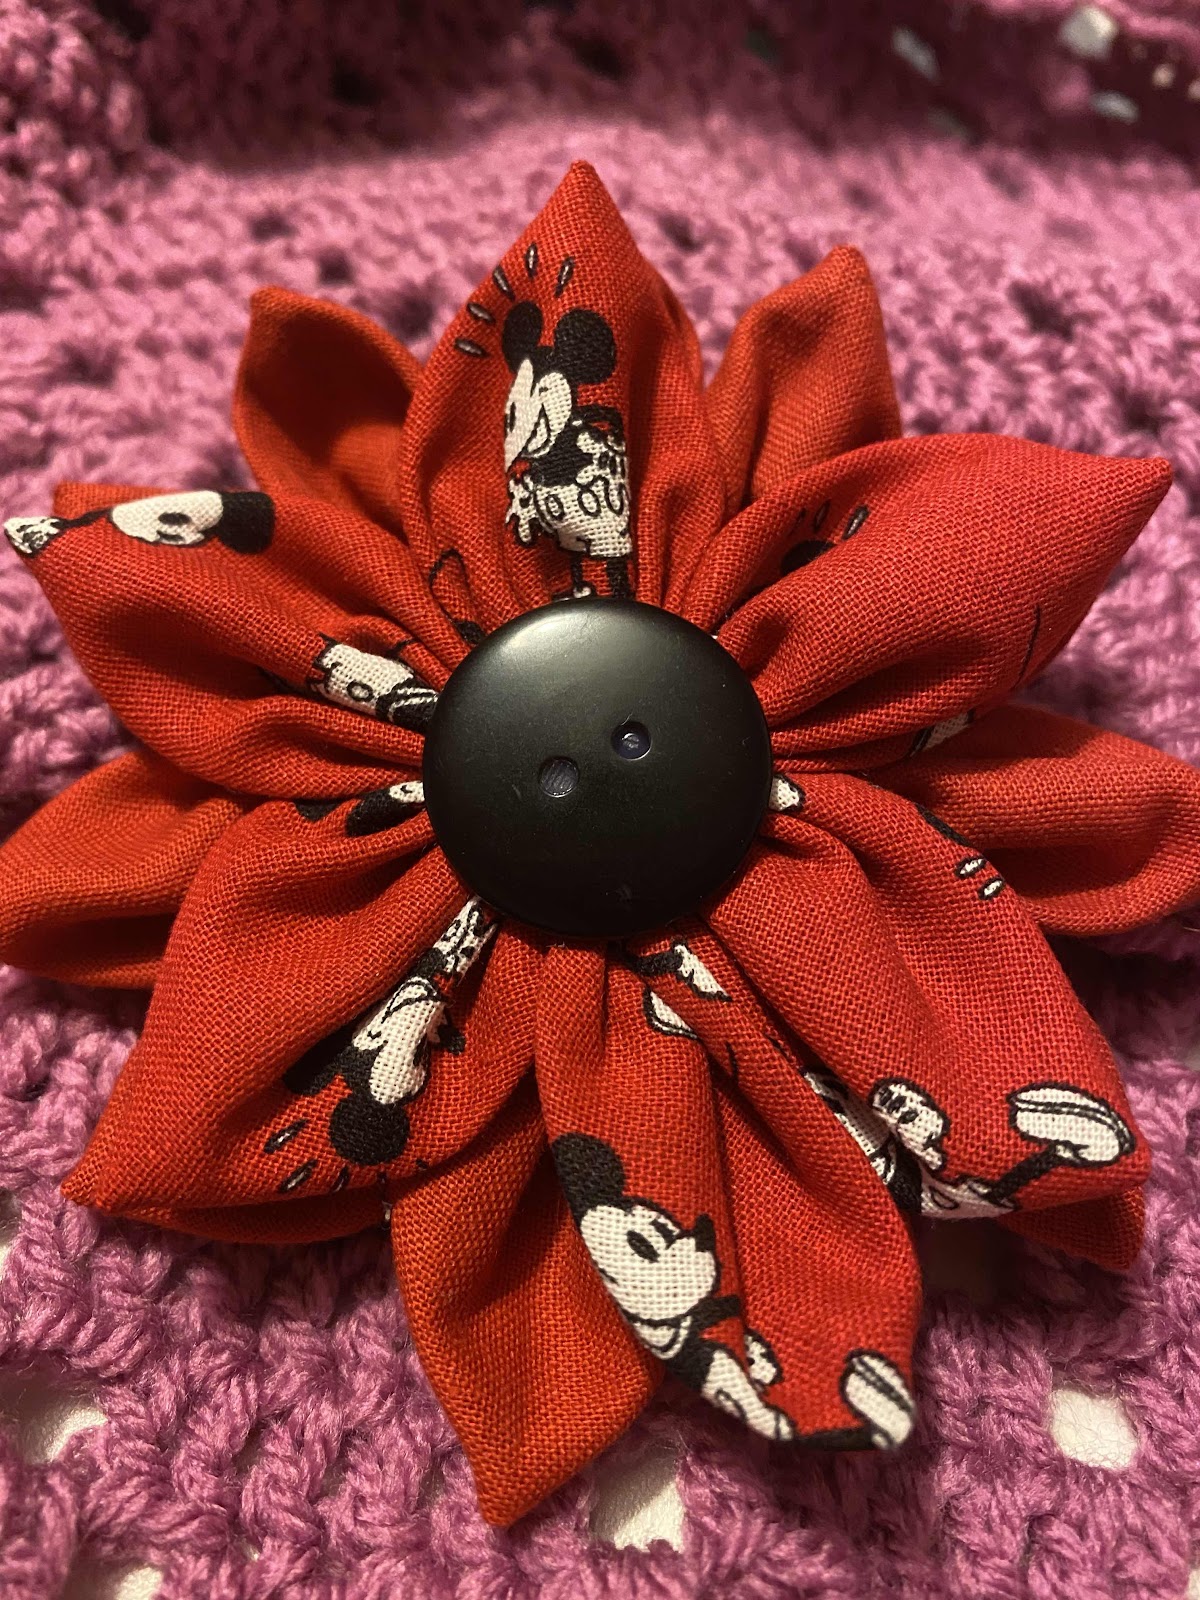
Fabric flowers


On Sunday I took a zoom class with Clare Mackaness from Beautiful Things. You can find her on youtube and Facebook or her website. I love how Clare makes everything achievable and fun. She teaches crafts, sewing and crochet to name a few things I’ve learned from her. Definitely recommend her if you are looking for something to learn online. 

The flower was made with circles of fabric, some machine sewing and some hand sewing. It could all be done by hand if you don’t have a sewing machine though. 

A button is used to finish it off and hot glue or fabric glue also comes into play. I yet again survived using my glue gun. Some days I just impress myself 😁 

I used a hair alligator clip to finish it off and for it to be able to wear it. In fact I put it in my hair and forgot it was there until I got ready for bed that night. 

A very fun class that leaves me ready to grab some of my scrap fabrics to make more. It’s and excellent project to use up scraps and odd pretty buttons we keep hold of. Great coordination items to go with home made items. Or even up cycling some well worn favourite clothes. 

After my last craft failure it was great to do something that worked well and came out well. Thanks Clare 

Saturday, 3 October 2020

Hogwarts house masks

Up until now I’ve not really made that many face masks. We have them of course but we have some ready made ones and a few home made ones. However, we have a Harry Potter related event happening with 4 people and I had some fat quarters of the houses so I had to make some face masks. I followed a tutorial from the stitch sisters on YouTube for a basic mask and it worked well. 

I didn’t even mind all the pressing/ironing the pleats in. Anyone who knows me knows I dislike using an iron. For sewing it kind of essential for a good finish though so was well worth it.  Here they are all pinned before final top stitch 

And here they are finished. Used a yellow thread because they all have yellow in them. Huge bonus and didn’t have to keep rethreafing machine for each mask. 

A while back I made my lively daughter in law this wristlet key fob and a scrunchy out of the same hufflepuff fabric and she was delighted with it. 


Just recently I have been doing smaller projects. It’s very satisfying to finish things all in one go and not stress about time for finishing them. 

Wednesday, 20 May 2020

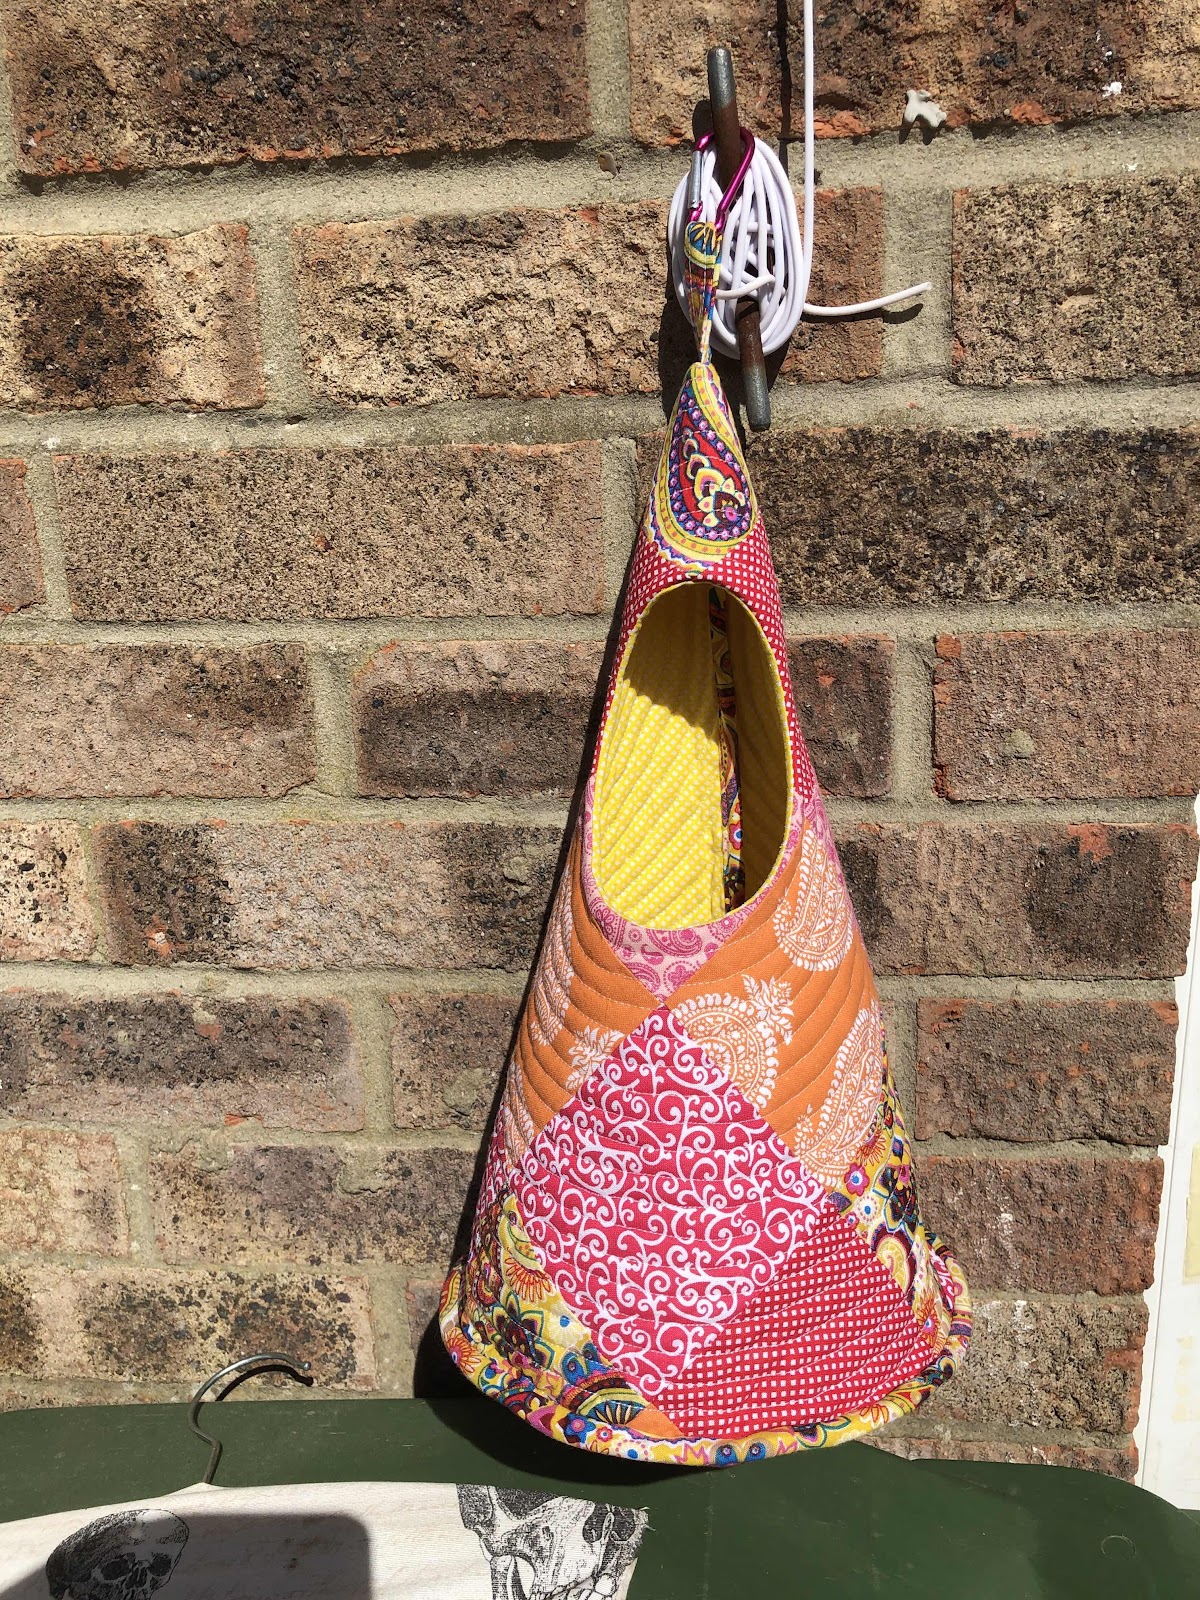
Peg teepee

I’ve not quilted in a while and I really didn’t need a new peg bag but when I saw someone else’s version. Of this I had to have one. It’s called a Quip by little patch pockets. I had just the bundle of fat quarters to use for it to. It can use squares, scraps or even just one fabric. 

I have to admit I really got confused at one stage and had to read the instructions 20 times as couldn’t figure out at which part to cut the fabric using the pattern/template. Anyone else do this? Read something wrong and then can’t read it correctly? Which was exactly what I did. Not the patterns fault it was mine! Got there in the end though. Took me a couple if evenings to make. Then, a 2 day gap. The last stage said to hand stitch the binding in place so I put it to one side as I hate hand sewing. 

Finally got around to the hand stitching and didn’t take me long at all in the end. I think it looks amazing. It’s not the sort of thing you make more than one of for yourself really which made it an expensive pattern for a one male use. However, now I’ve made one I know what to do and I might make a few more for friends etc and experiment with the look and quilting of it if I do. 

Bias binding and myself do not have a good history but this one distant fight me at all.  Maybe because I made it myself? Who knows. I’m counting if as a pleasant win and know I’ll be smiling every time I use this peg teepee as my daughter named it when I shared a photo when I started sewing this. 

Thursday, 7 September 2017

Fat Quarter sunshine AKA adventures in sewing Part 1

OK, maybe not sunshine as such but that's what these Dresden blades pieced together remind me of. Almost like a child has drawn a sun. I remembered earlier I had bought a Dresden blade quilt ruler a while ago. I knew I wanted to sew today but didn't want anything to difficult or big to do, but something new to.  Like any sewer I have a very interesting little collection of Fat Quarters. I am still hooked on these from my quilting days almost 16 years ago. Such prettiness to admire and dream of using one day in the perfect project. Does that perfect project ever arrive I wonder?


I chose just 2 Fat Quarters for the front of the cushion and cut out 10 blades of red and 10 of blue. It's hard to see in this light but they have little bits of glitter in this fabric. Glitter that doesn't spill everywhere like the half sequins I am still finding everywhere!


Very simply I sewed one of each colour together in pairs, with a 1/4 inch seam allowance then pressed the seams towards the blue side as it was darker..

Then sewed each pair to another pair, pressing in the same way. I carried on until I had all 2o forming a ring with a hole in the middle.


To cover the hole I cut out 2 pieces of material bigger that the hole in circles and sewed them right sides together.


Carefully making sure I had only one side of the circle I cut a slit.Turned the circle right sides out and pressed.


And I even impressed myself it still looks like a circle. Simply needed to pin the circle over the hole and chose a buttonhole type stitch on my machine and machine appliqued carefully around the edge of the circle attaching the circle over the hole. It took a bit of concentration and slow going in places but it did go on in the end.  Thankfully without the need of a stitch ripper.


As you can see I used red thread to highlight it a bit.


Not having another 2 of these FQ I struggled to find a contrasting 2 that I liked, so after auditioning a lot of fabric I decided to back the cushion in black needle cord fabric, logic was it probably is going to get a fair bit of use with children sitting on it on the floor or even in the garden so may as well have one hard wearing side.


How it has been left is smoothed out and pinned right sides together ready for my next hour I can sneak in to finish it, and while I consider the best way to finish this. Will update you in next day or two on how I finish the cushion off.


So until I can sneak off and sew again
Take care
Jules x


Saturday, 2 September 2017

Sequin cushions equals a glitter bomb


A while ago Alex AKA as my lovely daughter in law and I were out shopping.  We usually go together to certain shops and it is pretty much a certainty the fabric shop and Lush shop will be involved. The fabric shop had this sequin fabric that has 2 colours that change as you rub it in either direction, they had many colours and Alex chose green/silver sequins and black velvet for the back of the cushions.  Today was the day I chose to make these cushion covers. I had heard sewing sequin fabric could be a nightmare and so could velvet. Only problem I had was the sequins after I cut out the square fronts turned into a glitter bomb!  The photo below shows the sequins that came off after cutting one square out. It still continued to drop part cut sequins everywhere afterwards. A pain but oh so pretty.


I realised when I got the fabric home that the fabric the sequins are sewn to is only a fine mesh. I took a sheet someone gave me as it had a hole in it and cut out squares the same size as the sequin squares.  I sewed them right sides together leaving a few inches gap to turn it all right sides out, then top stitched round the edges securing it and sewing the gap shut. 


 The velvet was cut in 2 pieces per cushion cover. each one about 2/3 in height as the front square and as wide as the sequin square. I finished the edges off with my serger, I could of used a zig zag stitch to do this to.  I then did one edge of each one with a double sewn edge for the edges that overlap each other as this is where the cushion will fit into the cushion cover.  I pinned the first one to the top.


And the other one to the other end so they overlapped.  Making an envelope cushion cover. I sewed round all 4 sides and turned right sides out.


Which left me with 3 cushion covers altogether. 2 ready to be re homed with Alex and my son Paul. I can see the pair of them having much fun writing sweet and rude things in these cushions. 


All in all I had no problems at all. I did a bit of reading up first and  cut the sequin fabric with the sequins facing down and used a denim needle in my sewing machine.  It seemed to have done the trick and I spent a lovely couple of hours with pretty sparkles everywhere.  I think it will be a while before they stop showing up. But you can never have enough glitter right?

Take care
Jules

Wednesday, 2 August 2017

August so far.

How is it August already? I swear I blinked and July just skipped by in that blink! In fact I am pretty sure I got short changed in July at some point time wise. Although there were some epic moments. There has been a lot of decorating planning going on lately, I saw this picture in B&Q, didn't buy it and should have as I love the sentiment.  


So far August has given us rain. I have spent a while trying to do some origami butterflies. This one is still the best one to date.  I never was much good with origami but I will keep trying I need 10 origami butterflies at least. Maybe some better instructions are needed?  Or perhaps I just need to not look at mine so closely.  Fiddly things never were my forte, but they are fun even if it is only laughing at my attempts at the end.

Last week I came across this fabric in Fabric Land. and knew I needed to make a Sorbetto top from it or a variation of it.  I have a few I have made before and wear them often.  I know there is a new updated version that offers more variations these days but I have yet to download and use them.  It's a free pattern if anyone wants to try it out.


This was how it turned out. I made an inverted (?) pleat down the front and left the bottom open instead of catching the bottom in the hem.  
I would say excuse the mess but it's a tiny room full of book cases and boxes and it really doesn't get much tidier on my bookcases as they are all overflowing. 

Here's a closer look of the front detail. 


I did a bias binding hem! I tried this before and read the instructions wrong and the bias binding was done like a bias bound quilt edge or similar, so was visible.  So I gave it a go on the hem and neck line today and it was so easy and neat.  This may be my new hemming method. This was the bottom hem.

I can tell I have made a few of these before due to fact it only took me an hour and 12 minutes! And that included cutting out the fabric.  I usually play an audio book while sewing so I know how long it took by that.


Here's the neck edge. Different colour bindings I know, I was left at the last moment remembering I needed bias binding and didn't have enough of either.  At least they were both colour coordinated though


I then decided to make some chilli cheese cornbread for the boys to go with dinner. Looked a bit unconvincing to me when it was being mixed up


Looked OK upon coming out of the oven


It was a bit to dry though but tastes ok apparently.  I tried a small bit and reminded me of the flavour of  macaroni cheese but a little wimpier.  Still it got a compliment from Luke and was eaten so I am happy with that outcome.  Been a pretty creative day today.


I was even a superhero whooooooooo, eldest sons car battery died so I went over to give him a jump start.  Drove home and he and his girlfriend had broke down again so went back out to find them and got them sorted and followed them to their destination.  All sorted now.


So for tonight I am ready for an early nights sleep and a good day tomorrow. First though a little family time TV and make plans for tomorrows adventures.

Take care
Jules 
Thursday, 13 July 2017

Dancing Aliens birthday

Not sure how it happened but this little dancer is now 6! I got to watch her dancing on Monday with her outfit I had fun creating, I may be biased but I think she looked great.

I was asked to put an alien head on her shirt.  No worries I thought, then realised how small a shirt she wears.  If I had my thinking cap on before hand I would of unpicked the side seams, then sewed the head on the front of the shirt.  Then sewed the side seams back up. Of course I struggled with getting it sewn on until I clicked and was almost completed by then. Always leave it to me to do it all the hard way


The head band is just a simple plain little headband with glittery pipe cleaners twisted on and made into shapes.  Ever helped me with this, and I think added to the effect after it was given to her, and I super-glued two lots of big googly eyes on which I used four so they were double sided eyes.  My proudest moment of this piece was I used superglue and didn't stick myself or anything else to anything that wasn't intended to be stuck together.  I almost felt like a fully fledged adult for almost a nano second.


I didn't go to town to much with the tutu, as she still needed to dance and run around and not feel to hindered by it. Plus we have to show off the aliens silver leggings don't we?

So there we have it, I made an all dancing all singing alien outfit for a dance show, for the cutest alien going. I would do it again in a heartbeat as I had so much fun. Most importantly it was loved. 

I learnt I can use superglue responsibly.  Always check the remnant bin out in the fabric store.  I found the silver fabric for a ridiculous price.  Still have some left, so I expect that will come out to play in another project at some time. 

For now I am going to focus on smaller projects like bags to put Lego in. Similar to what I use for my knitting projects. I got asked to make a few to keep Lego kits in their own bags to save getting them all mixed up, and hopefully away out of the way of bare feet.

Take care
Jules 


Thursday, 6 July 2017

Aliens in silver

Today I was back working on my Eldest granddaughters Alien dance costume. This so far has consisted of making a purple sparkly tutu.  On Tuesday I said to someone what I need is a piece of silver fabric in the remnant bin in the fabric shop.  And hey presto there was one well over a metre there and although it didn't show up to well it almost has a holographic glitter effect to it.  I would describe this as legging or swimsuit fabric.  I wanted a small piece to cut an alien head out of but with this find I decided to do a pair of silver leggings to go under the tutu. I even found a label to put in to look professional. I bought the label sometime last year on sale in the range.  Fabric was from fabric land

Quick search on pinterest for a free legging pattern for a 6 year old took me to http://www.sewcanshe.com/blog/2015/10/10/basic-leggings-for-girls-free-pattern-and-tutorial  Got to say with the help of my overlocker/serger. This was a pretty quick and easy make. 


The label didn't even give me and problems.  Just hoping the little alien to be next Monday loves them as much as me and her Mum do.


I am thinking of trying out a few more pinterest crafts etc soon. You can find me here https://uk.pinterest.com/julesbathome/ on Pinterest. 
But for now I will say goodnight as it's been a long day, and I am off to dream of 70's disco dancers in sparkly silver trousers 

Take care
Jules xx 


Monday, 3 July 2017

Kapow! Batman we love you

I sewed with many memories in mind.  After the sad news of Adam Wests passing recently I have been thinking of how popular Batman is these days. I have always loved Batman, even owning a toy Batmobile as a child.  I was secretly thrilled when my older son as a young toddler became a Batman and Robin fan.  Way before it was fashionable, way before you could easily buy batman logo anything you can think of, he was a fan.  So the loss of the original Batman was sad to us both. A long while ago I bought half a metre of official Batman fabric and wondered for a long time what to make from it? I wish I had bought more at the time.  How fantastic is this?


I had a bit of a tidy up of my craft and sewing supplies yesterday and came across this insul-bright batting/wadding and my mind started thinking.


Then I was looking through books later that night and came across Half Yard Heaven by Debbie shore and I was away with a plan.


Red bias binding was needed.  After all when I think of the caped crusader I always think of his sidekick Robin. 


Have you guessed what I made yet? Oven gloves of all things. Useful things don't need to be all twee or super cute.


A view before I sewed down my nemesis bias binding all round the outside. Not perfect by a long shot but a lot better than my last big job I did with the stuff at least.


Didn't have anyone to pose or take pictures of them in action earlier so a quick pocket shot here for now.


I am pretty impressed, nice big pockets and didn't take long to make at all.  Best bit of all is every time they are used they will hopefully raise a smile and bring back some happy memories of a childhood hero that we will always love.

Who was your first childhood super hero? let me know in the comments

Adam West, thanks for the years of entertainment.  May you rest in peace and live on always in our heart

Take care
Jules xxx 

Thursday, 16 February 2017

How to upset your youngest granddaughter

This is my eldest granddaughter Ever, you can tell from the beautiful smile! She is modelling the collared cloak I made with the help from her younger sister Ruby and her Mum Leanne yesterday.


Here is the view from the back. 

Younger granddaughter looks scared doesn't she? Beautiful but scared.


And here you would of thought we had been torturing her.


Story behind these photos starts off a long time ago in the fabric shop.  I found this lovely soft fabric in 2 colours.  They have like a rose swirl design on them.  I was so taken with it I dragged my daughter in to ask what she thought and maybe if something could be made for the girls with it? The girls are in need of dressing up bits so we decided this colour would make a brilliant princess cape for over the princess dresses they have.  At this point Ruby is in love with the fabric, so soft and fluffy.

Fast forward to yesterday, text from Leanne and can we do something together? We decided on a making day. So dragged out the fabric and a pattern and had a lovely time cutting out the pattern pieces, Ruby helped all the way including with the pinning and ribbon choice etc.  Lots of 'I do it's' and 'I help' Absolute delight in the whole process,  And believe me she helped a lot. She was enchanted watching the sewing machine sew. And after a few hours we had this beautiful satin lined cloak.

Then She refused point blank to wear it for a photo for me her Nana. OK fair enough, it went home with her and Leanne said she would try after shower time. Then I think it became all to much for her and there was no way this was going to happen willingly.  Poor child looks like she is being tortured into wearing something she really hates lol. So in the end the beautiful Ever stepped in and modelled it perfectly for Mum so I could have some photos to share.

So that folks is how to upset your granddaughter, simply get her to help make something she really loves and ask her to wear it.

So onto more less dramatic items I think 

Take care
Jules